
Introduction – Eyebrow Lamination Step-by-Step
Eyebrow lamination is a revolutionary beauty treatment that helps you achieve fuller, smoother, and well-groomed brows without the need for permanent makeup. Whether you have unruly, thin, or uneven brows, this procedure enhances their shape and structure for a polished and defined look. In this guide, we will walk you through the Eyebrow Lamination Step-by-Step so you know what to expect.
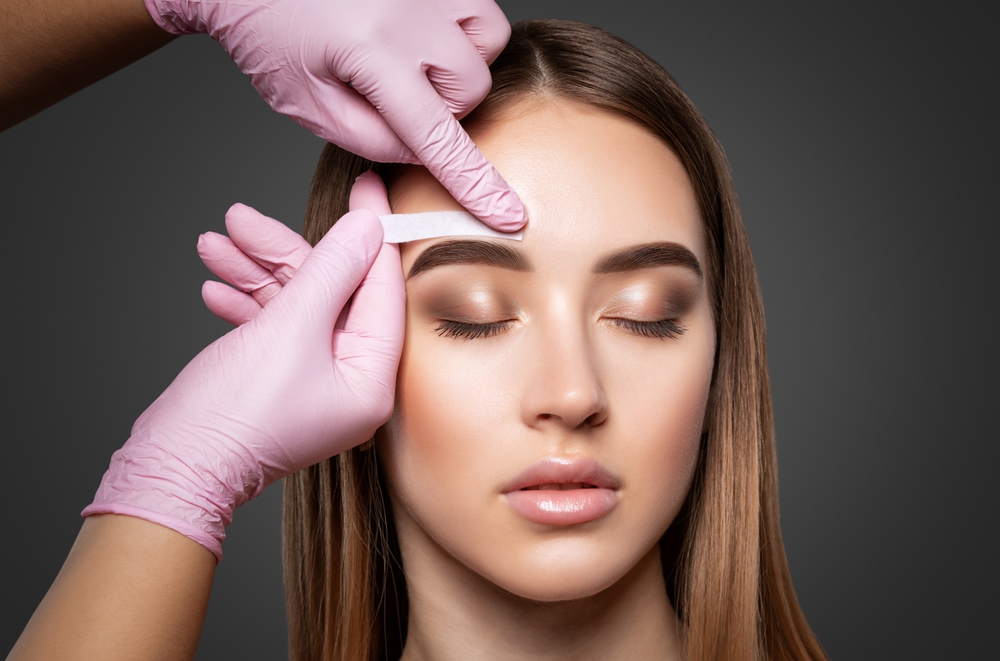
Step 1: Consultation and Preparation
Before the actual lamination process begins, a consultation with a brow specialist is essential. During this step:
- The technician assesses your natural brows.
- You discuss the desired shape, style, and fullness you want to achieve.
- Your brows are cleaned to remove any dirt, oil, or makeup.
This step ensures the best results by tailoring the treatment to your preferences and brow type.
Step 2: Applying the Lifting Solution
The first solution used in brow lamination is a lifting cream, which softens the brow hairs and makes them more flexible for shaping. The technician will:
- Apply the lifting solution using a small brush.
- Use a spoolie to gently comb and shape the brows into the desired position.
- Allow the solution to sit for 5 to 10 minutes, depending on hair thickness.
This step helps to break down the natural bonds in the hair, making it easier to set them into place.
Step 3: Setting the Brows with a Neutralizer
Once the lifting solution has done its job, the technician applies a neutralizing solution. This step:
- Locks the brows into the new shape.
- Ensures that the hairs stay lifted and structured for weeks.
- Remains on the brows for another 5 to 8 minutes.
The neutralizer helps rebond the hair structure in its new lifted shape, ensuring long-lasting results.
Step 4: Nourishing Treatment
Since the chemical process can make the brow hairs dry, a nourishing treatment or keratin conditioner is applied. This treatment:
- Hydrates and strengthens the brows.
- Restores lost moisture and prevents damage.
- Enhances the natural shine and smoothness of the brows.
This step is crucial for maintaining healthy and well-conditioned brows after lamination.
Step 5: Tweezing and Trimming (Optional)
If needed, the technician will refine the brows by:
- Tweezing stray hairs to create a clean shape.
- Trimming long hairs for a more polished look.
- Filling in sparse areas with a tint if requested.
This finishing touch helps to perfect the brows and enhance their overall appearance.
Step 6: Aftercare Instructions
To ensure long-lasting results, proper aftercare is essential. Here are some key aftercare tips:
- Avoid water, steam, or sweat for the first 24 hours.
- Do not apply oily products or makeup directly on the brows.
- Brush your brows daily to maintain the lifted shape.
- Use a nourishing serum or castor oil to keep brows hydrated.
Following these steps will keep your brows looking fresh and beautiful for up to 6 to 8 weeks.
Conclusion – Eyebrow Lamination Step-by-Step
Eyebrow lamination is a simple yet effective treatment that gives you sleek, defined, and fuller brows without daily maintenance. By following this step-by-step guide, you can understand how the process works and why it has become a must-have beauty trend. If you’re looking to enhance your brows effortlessly, consider booking an eyebrow lamination appointment today!
Discover More About WriEyebrow lamination
Book your Eyebrow lamination appointment today and indulge in the perfect blend of relaxation and beauty with Minounails! Contact us now.
Read more related articles to enhance your knowledge and make informed decisions about cosmetic procedures.
Minou Nails Best Semi Permanent Makeup in Delhi
What is Semi-Permanent Makeup – What It Is and Why It’s Popular